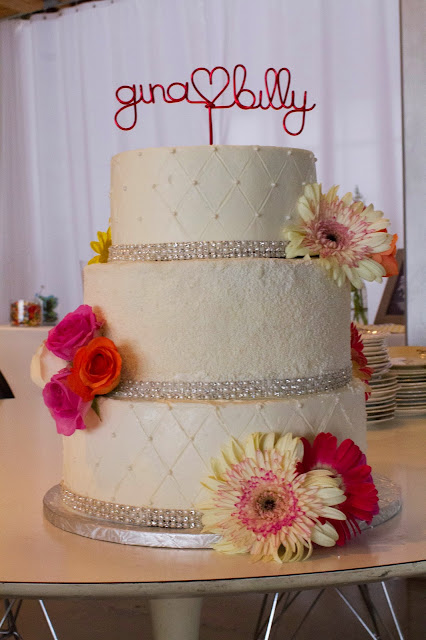
I made a wedding cake. For 150+ people (it was quite large). It was a while ago, but I'm going to post about it anyways, because it's too cool not to show off. Plus, I actually remembered to take step-by-step pics!
The couple wanted the inside to have a surprise, so we made the tiers in different ombre shades.
Top layer was an 8" round cake in shades of red/orange. I baked very thin layers so I could get a smoother ombre effect as the colors fade into each other.
It's important to get the layers level, especially the bottom tier. Because it supports the weight of the rest of the cakes, if it's uneven even a little bit on the bottom tier, the entire cake will start to learn over. So, I picked up a new level at Home Depot, ran it through my dishwasher, and got to work!
The layers all lined up next to each other. Yellow base tier was a 12" round--it barely fit into my little oven.

First coat of frosting was a crumb coat. I used a thin, rough layer to seal in the crumbles before I smoothed everything out with a second layer.
Oops. Skipped a few steps. I smoothed out the frosting and pressed the diamond pattern into the cake using an impression mat and defining the lines better with a nice, big knife. Then, using tweezers, I added sugar pearl at each intersection to give the cake that beautiful quilted effect.
The trim is non-edible, but oh so pretty! I love the rhinestone and pearl combination because it gave it a bit of sparkle without being too over the top and the pearls on the ribbon matched the sugar pearl detailing.
The middle layer is covered in white nonpareils. The texture was really beautiful, plus it's a very forgiving technique. I was having trouble getting the icing even, but after the sprinkles are applied (literally by throwing them at the cake), it evens everything out.
I'm very proud of the nice, crisp edges at the top of the cake and the smooth surface.
Flowers placed by yours, truly, by the way.
Some detail shots.
This cake was assembled on-site. I put each tier in its own box and loaded them up into the trunk. I had a "cake kit" with the trim, scissors, paper towels, extra sugar pearls, loaded pastry bags, and everything else I could possibly see myself needing crammed into my trunk. Then, I drove very, very slowly.
The finished product!


No comments:
Post a Comment