These cookies were made for a new veterinary practice. They wanted a treat to bring to animals hospitals in the area to announce their presence, and I think the message came accross pretty clearly!
I was worried that the red, black, and white colors in the logo would bleed together, so I waited quite a bit of time between piping each layer.
So that the cookies wouldn't get stale, I started by just piping all 125 cross logos in red onto wax paper. This was great because it let me fix my mistakes, but, most importantly, I had a printout of the logo under the clear wax paper, so I could trace the design. This helped me keep them consistent.
I waited a day before piping the black dogs onto the red crosses.

I baked the cookies, outlined them in red royal icing, and let the red dry a day. That same day, I painted the black dogs from the decals in silver luster dust to cover any imperfections and make them even more memorable.
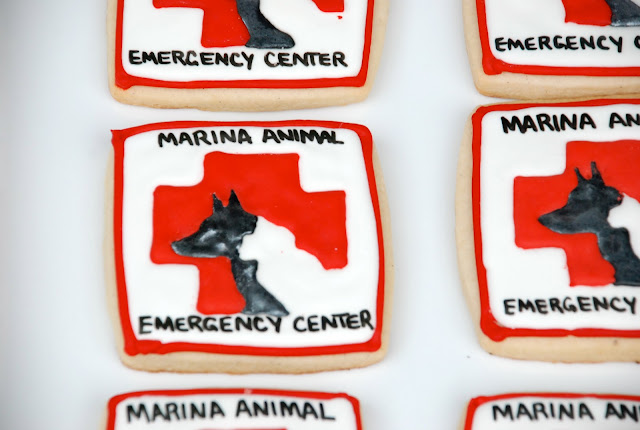
The next day, I flooded the centers of the cookies in white icing and while it was still wet, I carefully peeled off the decal I mad made and plopped it onto the wet icing, pressing gently.
Once they dried, my mom used an edible marker (basically food coloring in a marker with a felt tip) to write the name of the hospital on each cookie. Finally, I boxed them up with layers of wax paper and tissue paper. Each dozen cookies got their own little box.
These cookies took days and an incredible amount of work! My kitchen was covered in cookies for days because they're HUGE and took up every available tray, tupperware, and surface.
But they're pretty cute, aren't they?


